Hey all! I was going to wait until Monday to really start this blog but, I thought it would be fun to kick off with a great outdoor project that you and your friends can enjoy at your next get together. I have helped with some of these before and they can really turn out to be a great addition! As an added bonus it can add value to your yard! After putting one of these together you can pull up some chairs, grab a few cold drinks and enjoy the evening with friends and family! At the end I’ll also place a link to a great recipe for a BBQ to enjoy after completing the project!
So without further ado, here is the list of materials and instructions to bring one of these great features to your home! (This will be for a circle pit, after the instructions I’ll add the link for a square one if you so desire to make one!)
Materials and tools:(amounts are going to depend on how big you make your fire pit)
paver stones
cap stones
sand
shovel
measuring tape
level
steel rake
something to tamp down the sand
metal grate of some sort to to put on top(optional)
***Ok so as a boring side note here, let me put out this small disclaimer….be sure to check your local government law and regulations as to building and having one of these in your yard…back to the fun parts!
Step 1:
Lay out your pavers in a circle in the approximate size and shape of your fire pit. Mark the ring either with spray paint or just do what I did and use the shovel and run it along the outside of that first ring of pavers to mark.
Step 2:
When you have your circle roughed out, dig a 12-inch-deep hole in that location.
Step 3:
Pour sand into the bottom of the hole and tamp the sand level.
Step 4:
Begin to lay your wall stones around the perimeter of the hole. After the first row is in, use the level again to make sure the stones are level. Continue stacking the stones so that they are 12 inches above the surrounding ground.
Step 5:
Pour a layer of sand into the ring of stones so that it covers the first layer, approximately 4 inches deep.
Step 6:
I recommend using the level after getting all the rows of pavers in. The ones I’ve helped install have been 4 levels total but, 5 is probably ok. Too many levels will cause you to not be able to enjoy the warmth and too few could be a fire hazard.
I have seen some people put in decorative rocks inside or a metal fire ring, these are options that will clearly up the cost but, will also make it look a bit more unique.
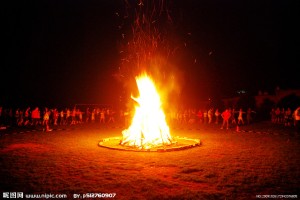
Now enjoy your beautiful fire pit to enjoy for years to come!
Here is the link for the square pit: http://www.allanblock.com/courtyard/fire-pit.aspx
I’ve never made one but they can look very good as well when done right in the right place.
Now for the FOOD!! For this week, I thought I’d start with a simple, light, yet delicious recipe that is easy to grill. Enjoy!
http://www.foodnetwork.com/recipes/ina-garten/grilled-herb-shrimp-recipe.html
Thanks for reading and have a great weekend!
